How to install a HP Vertica Database Cluster
In this tutorial we will demonstrate how to create,install and configure a 3 nodes Vertica Cluster.
Install the SO (Linux-CentOS)
1-Increase the swap space to a minimum of 2 Gb
2-Space and CPU requirements:
-Vertica requires at least 1 GB per CPU. -disk utilization per node should no more than sixty percent (60%): Disk space is temporarily required by certain query execution operators, such as hash joins and sorts, in the case when they have to spill to disk. -configure TEMP SPACE separate from data disk space.3-Install the prerequisite for Vertica Cluster
yum install -y rsync  python*  telnet ruby*  java* sudo  openssh-server openssh-clients
# chkconfig sshd on
# service sshd start
4-Edit the /etc/pam.d/su file
# vi  /etc/pam.d/su
#add the line
session required pam_limits.so
5-Verify that the NTP Daemon is Running
chkconfig --list ntpd

#if is not on use the commands
chkconfig ntpd on
#start ntp service
/etc/init.d/ntpd start
6-Remove Nonessential Applications
For optimal performance, Vertica is designed to use all available resources on each host machine. Vertica recommends that you: Remove or disable all non-essential applications from cluster hosts 7-Configuring the NetworkAlter the /etc/hosts file
Make sure file exists and that it contains the loopback address 127.0.0.1# Do not remove the following line, or various programs
# that require network functionality will fail.
127.0.0.1 localhost.localdomain localhost
xxx.xxx.xx.128 host01
xxx.xxx.xx.129 host02
xxx.xxx.xx.130 host03
xxx.xxx.xx.131 host04#vim /etc/ sysconfig/network
Alter the hostname and set it to the desired name :
HOSTNAME=host01#vim /etc/profile or /etc/bashrc
Add the line
export HOSTNAME='hostname'7.4-Verify that the hostname resolution works correctly
Verify this with the command$ /bin/hostname -f
Hostname7.5 - Disable the firewall
Firewalls - not recommended for database hosts SELinux (Security-Enhanced Linux) Iptables7.6 Provide Root and for dbadmin user to SSH Access to the Cluster
Steps to do it for root or dbadmin user:[root@Vertica_Master1 ~]# ssh-keygen
Generating public/private rsa key pair.
Enter file in which to save the key (/root/.ssh/id_rsa):
/root/.ssh/id_rsa already exists.
Overwrite (y/n)? y
Enter passphrase (empty for no passphrase):
Enter same passphrase again:
Your identification has been saved in /root/.ssh/id_rsa.
Your public key has been saved in /root/.ssh/id_rsa.pub.
The key fingerprint is:
7c:b5:11:48:d3:c1:e6:f5:80:b3:4a:4a:93:ed:16:99
root@Vertica_Master1
The key's randomart image is:
+--[ RSA 2048]----+
| .o+oo |
| ..*.o |
| o =o+ o |
| .+ E.oo .|
| .S=.o. |
| ..+ |
| . |
| |
| |
+-----------------+[root@Vertica_Master1 ~]# cd ~
[root@Vertica_Master1 ~]# chmod 700 .ssh
[root@Vertica_Master1 ~]# cd .ssh/
[root@Vertica_Master1 .ssh]# cp id_rsa.pub authorized_keys[root@Vertica_Master1 .ssh]# cat id_rsa.pub
ssh-rsa AAAAB3NzaC1yc2EAAAABIwAAAQEArX26Pgsyvkw+o0Vimm2.............
[root@Vertica_Master1 .ssh]# ssh root@Vertica_Master2
The authenticity of host 'vertica_master2 (11.222.1.224)' can't be established.
RSA key fingerprint is ff:9c:48:27:7d:6b:a1:39:5a:17:d0:a3:a3:9d:f0:48.
Are you sure you want to continue connecting (yes/no)? yes
Warning: Permanently added 'vertica_master2,11.222.1.224' (RSA) to the list of known hosts.
root@vertica_master2's password:xxxxxx- #this is the password for the root user
Last login: Tue Sep 4 15:11:35 2012 from host1
[root@Vertica_Master2 ~]# hostname #check to see that you are on the Vertica_Master2
Vertica_Master2
[root@Vertica_Master1 .ssh]# vim authorized_keys8 -Download and install Vertica software on Master Node(where you will run the Administrative jobs of the cluster)
As root :#rpm -ihv vertica-6.0.0-3.x86_64.RHEL5.rpm
After entering the command, a progress indicator appears:
Preparing... ##################################### [100%]
1:vertica ##################################### [100%]
Vertica 6.0.xx successfully installed on host hostname.8.1- Run the Install Script
On the master node run the following command# /opt/vertica/sbin/install_vertica -s host_list -r rpm_package -u dba_username- Where options are :
- Example :
-s host01,host02,host03
-s xxx.xxx.xxx.101,xxx.xxx.xxx.102,xxx.xxx.xxx.103

-r rpm_package The pathname of the Vertica RPM package. -r "vertica_6.0.x.x86_64.RHEL5.rpm"
-u dbadmin user name
-p dbadmin passowrd
-P root password
-L location of the license
-d where data will be located
-s nodes that will be part of the cluster
-r location of the installation rpmExample of full command for 3 nodes cluster :
#[root@T1 sbin]# /opt/vertica/sbin/install_vertica -u dbadmin -p dbadmin -P vertica
-L /00.dat -d /v_data -s 11.222.1.195,11.222.1.178,11.222.1.183 -r /v_data/vertica-6.1.2-0.x86_64.RHEL5.rpm
Vertica Analytic Database 6.1.2-0 Installation Tool
Upgrading admintools meta data format..
scanning /opt/vertica/config/users
Starting installation tasks...
Getting system information for cluster (this may take a while)....
backing up admintools.conf on 11.222.1.195
Default shell on nodes:
11.222.1.183 /bin/bash
11.222.1.178 /bin/bash
11.222.1.195 /bin/bash
NTP service not synchronized on the hosts: ['11.222.1.183', '11.222.1.178', '11.222.1.195']
Check your NTP configuration for valid NTP servers.
Vertica recommends that you keep the system clock synchronized using
NTP or some other time synchronization mechanism to keep all hosts
synchronized. Time variances can cause (inconsistent) query results
when using Date/Time Functions. For instructions, see:
  * http://kbase.redhat.com/faq/FAQ_43_755.shtm
  * http://kbase.redhat.com/faq/FAQ_43_2790.shtm
Info: the package 'pstack' is useful during troubleshooting.  Vertica recommends this package is installed.
Checking/fixing OS parameters.....

Setting vm.min_free_kbytes to 45056 ...
Detected cpufreq module loaded on 11.222.1.183
Detected cpufreq module loaded on 11.222.1.178
Detected cpufreq module loaded on 11.222.1.195
CPU frequency scaling is enabled.  This may adversely affect the performance of your database.
Vertica recommends that cpu frequency scaling be turned off or set to 'performance'


Creating/Checking Vertica DBA group

Creating/Checking Vertica DBA user

Installing/Repairing SSH keys for dbadmin

Creating Vertica Data Directory...

Testing N-way network test.  (this may take a while)
 All hosts are available                            ...
Verifying system requirements on cluster.
 IP configuration                                   ...
 IP configuration                                   ...
 IP configuration                                   ...


Running Consistency Tests
 LANG and TZ environment variables                  ...
Running Network Connectivity and Throughput Tests...
Waiting for 1 of 3 sites...                         ...

  Consistency Test (ok)
=========================

  Info: The $TZ environment variable is not set on  11.222.1.195
  Info: The $TZ environment variable is not set on  11.222.1.178
  Info: The $TZ environment variable is not set on  11.222.1.183

  Network Test (ok)
=====================

    Network communication (ok)
  ------------------------------

    Low throughput 11.222.1.195 to 11.222.1.183: 70.0120684446 Mbps; check network interface/switch configuration
    Low throughput 11.222.1.195 to 11.222.1.178: 89.6343295543 Mbps; check network interface/switch configuration
    Low throughput 11.222.1.178 to 11.222.1.183: 96.7054792053 Mbps; check network interface/switch configuration
    Low throughput 11.222.1.178 to 11.222.1.195: 74.555364322 Mbps; check network interface/switch configuration
    Low throughput 11.222.1.183 to 11.222.1.195: 77.8958682571 Mbps; check network interface/switch configuration


Updating spread configuration...
Verifying spread configuration on whole cluster.
Creating node node0001 definition for host 11.222.1.195
... Done
Creating node node0002 definition for host 11.222.1.178
... Done
Creating node node0003 definition for host 11.222.1.183
... Done
Error Monitor  0 errors  4 warnings
Installation completed with warnings.
Installation complete.

To create a database:
1. Logout and login as dbadmin.**
2. Run /opt/vertica/bin/adminTools as dbadmin
3. Select Create Database from the Configuration Menu

** The installation modified the group privileges for dbadmin.
   If you used sudo to install vertica as dbadmin, you will
   need to logout and login again before the privileges are applied.
9- Create the database using the admintools tool
From the comand line open the admintools and choose the "Create Database option"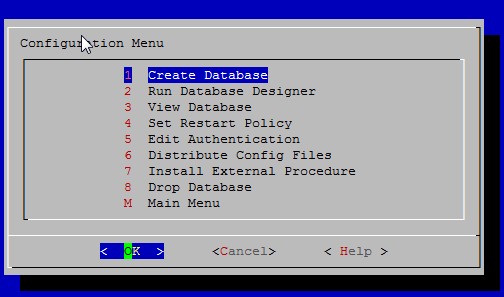 Choose the name of the database.
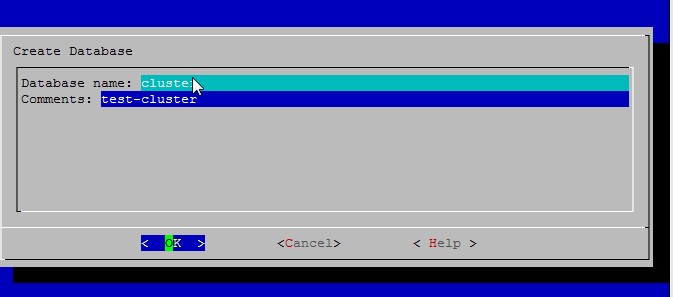
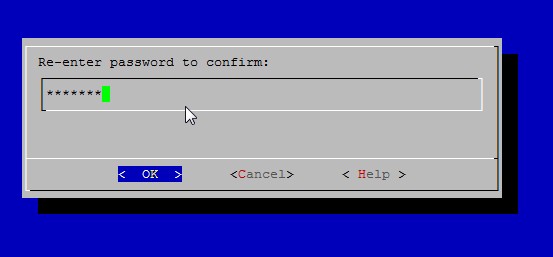 Choose the hosts where the database will reside.
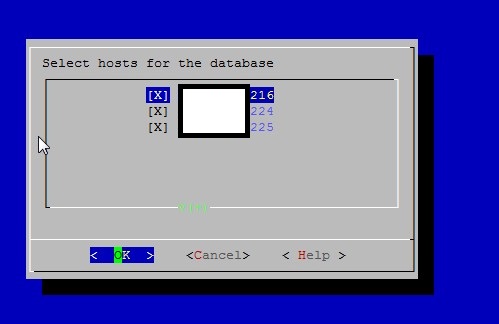 Choose the place where the data and catalog will be stored. (Remember that this path must be the same in all hosts/nodes that
the database will be part of)
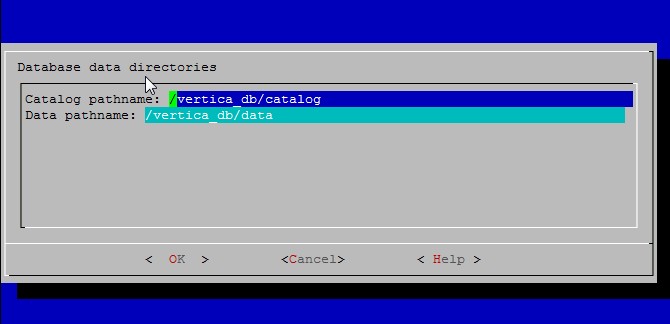 Confirm the database creation.
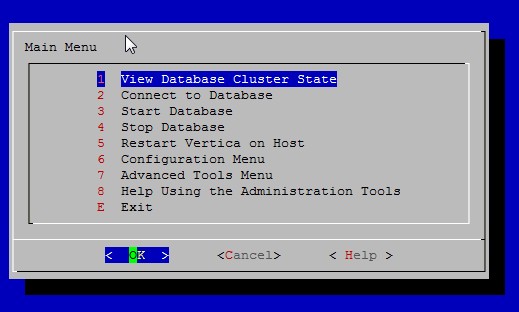
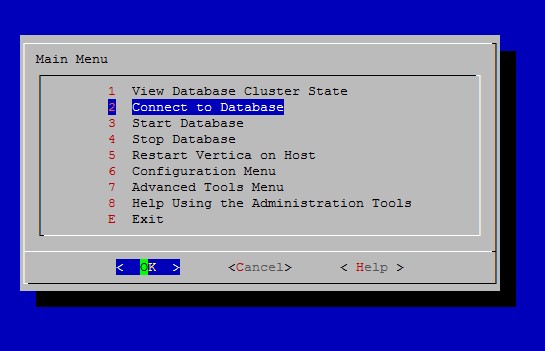
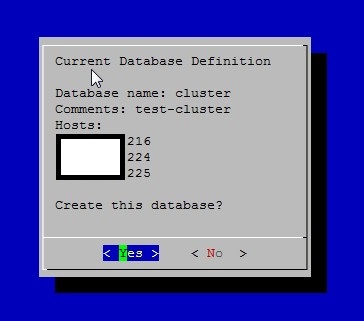 After the database creation view the Cluster State choosing the option form the admintools menu.
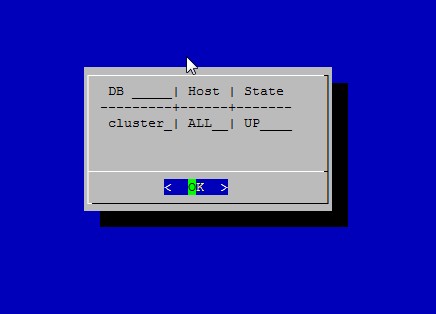
 See that cluster is up and running on all nodes.
 Using the option from the admintools connect to the database.
 Welcome to Vertica 6.

